Design Inspiration Supplies
Design Instructions

Supplies needed
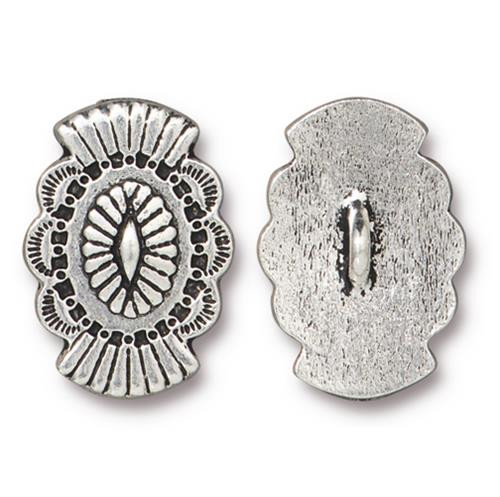
- 1 Western Button (94-6600-12)
- 24" 1.5mm round leather cord, brown
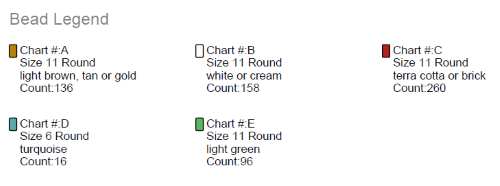
- 5g Size 11° Japanese seed beads, terra cotta
- 4g Size 11° Japanese seed beads, white
- 3g Size 11° Japanese seed beads, light brown
- 2g Size 11° Japanese seed beads, turquoise
- 16 Size 6° Japanese seed beads, Picasso turquoise
- Size D braided beading thread, black
- C-Lon cord, copper
- Fabric glue
Tools
- scissors
- beading loom
- beading needle
Skill Level: Intermediate
Finished Size: Approx. 7”
Designer: Tracy Proctor


Tips: Keep your tension even while working the loom and when stitching the leather to the loomwork so the resulting bracelet is supple when worn. The size 6° beads take the place of 4 size 11° beads. If you want to add length to this bracelet 5 rows of beads is about 1/2". Optional: when adding length, instead of following existing pattern, starting at Row 61 try repeating the diamond pattern for desired number of rows.
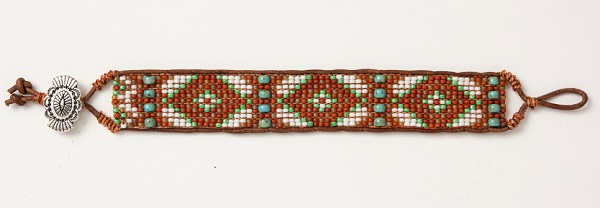
Click here for downloadable legend and bead pattern. To download the project pdf click here - Desert Colors Bracelet PDF
Steps
-
Use C-Lon to warp the beading loom according to manufacturer’s directions. Warp the loom so the first placement is 2 size 11° seed beads wide, the second is 1 wide, the third is 2 wide, the fourth is 1 wide, the fifth is 2 wide, the sixth is 1 wide, and the seventh is 2 wide.
-
Use seed beads to work the loom, following the pattern for color placement. Note: In the places where the warp is 2 size 11° seed beads wide, string 2 size 11° beads or 1 size 6° bead to fill the space, depending on the pattern. (When using 6° beads, stitch through the same bead in two consecutive rows.) Set the loomwork aside.
-
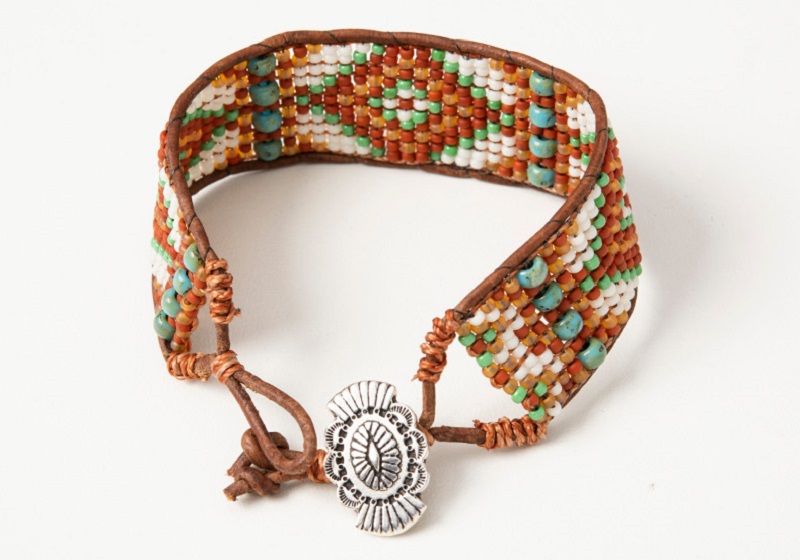
Fold the leather cord in half. Tie C-Lon around the doubled cords 3/4" from the fold to form a loop. Neatly wrap C-Lon around the cords several times to form a 1/8" embellishment. Tie a strong knot to secure; add a small amount of glue to the knot and let dry.
-
Lay the loomwork on the work surface. Draw each leather cord down the sides of the loomwork so the leather loop sits at one end.
-
Use the braided beading thread to loosely stitch each leather cord to the sides of the loomwork, making sure the leather loop stays centered at the end of the work. Note: The triangle formed between the leather loop and the loomwork should be about 3/8" long.
-
Gather the leather cords together at the other end of the loomwork. Tie C-Lon around the doubled cords about 3/8" from the loomwork. Neatly wrap the C-Lon around the cords several times to form a 1/8" embellishment. Tie a strong knot to secure; add a small amount of glue to the knot and let dry.
-
Pair the leather cords to string the button. Tie C-Lon around the doubled cords about 3/8" from the knot added before adding the button. Neatly wrap the C-Lon around the cords several times to form a 1/8" embellishment. Tie a strong knot to secure; add a small amount of glue to the knot and let dry.
-
Tie an overhand knot with one of the leather cords, 1/4" from the last knot formed. Repeat with the second leather cord. (Optional: add a small amount of glue to each knot.)
-
Use C-Lon to form 1/4"-long wrapped embellishments (as in Steps 3, 6 and 7) around the leather cord at each corner of the loomwork. Be sure to tie strong knots and add a small amount of glue to secure the embellishments.
-
Trim any excess leather cord, C-Lon cord, and beading thread.

